Sprouted barley grains to maintain health and vitality. How to germinate barley at home and why it is needed How to germinate barley for food
Barley is one of the most common grain crops. If you want to grow it yourself, be sure to read our article. You will learn everything about plant varieties and growing conditions.
A detailed description of the technology of sowing, caring for and harvesting will help you cope with the cultivation of grain crops, and you are guaranteed to get a rich grain harvest at home.
How to grow barley at home
 Among grain crops, barley is considered the earliest ripening, so you need to know exactly how to grow it at home to get a good harvest.
When cultivating this crop, you need to take into account some features: requirements for soil, heat, humidity and lighting.
Growing conditions
Proper sowing plays a key role in obtaining a good harvest. The main condition for high seed germination is early sowing. Thanks to moderate temperatures and sufficient humidity, the crop germinates evenly and quickly gains green mass.
Due to the structure of the root system, it is demanding on soil fertility. The area for sowing must be fertilized and cleared of weeds in advance. Potatoes, corn, winter crops and leguminous crops are considered the best crop predecessors.
Growing technology
Sowing begins in the first week of spring field work. If planting is done later, the sprouts may be damaged by diseases and pests, and the yield will be reduced. Despite the fact that narrow-row and row methods are used for sowing, preference should be given to the first.
Note: With the narrow-row sowing method, the distance between the rows is only 7.5 cm. Thanks to this, the seeds germinate more closely and almost simultaneously, and the high plant density prevents the development of weeds.
Using the narrow-row method, it is necessary to strictly adhere to sowing standards, since planting too densely will negatively affect the quality and quantity of the harvest. Depending on the region, the following standards are used:
- Far East and Non-Black Earth Zone - 5-6 million per hectare;
- Central strip and Chernozem zone - up to 5.5 million grains per 1 hectare;
- Ural and Volga region - 3.5-4 million seeds per hectare.
The sowing depth also plays an equally important role. If the seeds are close to the soil surface, they will begin to germinate unevenly, and if the grains are placed at a greater depth, some of the sprouts will die without ever breaking through to the surface.
The average sowing depth depends on soil and climatic conditions. For arid regions it is 6-8 cm, for sandy soils - 5-6 cm, and for heavy clay soil - no more than 4 cm.
The growing technology with all stages is shown in detail in the video.
For human consumption and preparation of feed raw materials, only cultivated varieties are used. They come in several types (Figure 1):
- A two-row plant produces only one spikelet, and the lateral shoots do not produce a harvest;
- Multirow - a plant with multiple ears. It is characterized by high yield and resistance to drought;
- The intermediate one produces from one to three ears. This species is considered rare for our country, as it is found only in some regions of Asia and Africa.
 Figure 1. Main types of crops
 In addition, a classification by type has been adopted depending on nutritional value. Grain of the 1st grade is used for the production of cereals, and the second - for the preparation of malt and animal feed. Additionally, it is divided into winter and spring (differing in sowing time, germination and yield).
Where is barley grown in Russia?
It is difficult to clearly determine where barley is grown in Russia, since this grain crop is considered one of the most widespread in the world.
Note: In the world it ranks fourth in terms of area under crops, second only to wheat, rice and corn. In Russia, it is the crops of this plant that occupy a leading position due to the undemanding nature of the crop.
The crop is grown everywhere in Russia. The only exceptions are the northern regions (the northern border of the crops passes through the latitude of the Kola Peninsula and Magadan). In general, the undemanding nature of the crop and the varieties specially bred by breeders make it one of the best for cultivation in the Russian climate.
Barley varieties
Due to the wide variety, beginning farmers often have the question of which plant variety to choose. In this case, you need to be guided not only by soil and climatic conditions, but also by the level of yield and the characteristics of certain varieties.
Below are the characteristic features of the best varieties of barley for growing in the Russian climate.
Barley variety in memory of Chepelev
The Chepelev memory variety was created by breeders by crossing several varieties. The main feature of the variety is that it was created specifically for cultivation in the climate of Siberia and the Urals (Figure 2).
 Figure 2. Chepelev memory variety
 In addition, the crop has good acclimatization to different growing conditions and has stable yields regardless of soil, temperature and lighting conditions. The variety also effectively resists drought, and although they are considered mid-season, the shoots are highly resistant to diseases and pests.
Description of barley variety Bogdan
This variety is one of the subspecies of grain crops. This grain is used primarily for the production of animal feed.
A characteristic feature of the variety is that it can not only be grown in the field by sowing, but also found in the wild. It is most often found in arid regions. The crop is valuable due to its unpretentiousness, and high yields and grain quality make it possible to produce nutritious and fortified animal feed based on it.
Maned barley planting and care
It is rather a decorative crop that is actively used in landscape design. The plant has soft stems that end in lush tassels (Figure 3).
Note: During the flowering period, it is better to pick off the tassels to prevent self-seeding.
Planting and caring for the crop is very simple. Since it is unpretentious, it is enough to sow it just once in the garden. Further care only involves removing the tassels during flowering, but even if the crop spreads throughout the garden, it will be easy to remove. The root system is shallow, so the plant is very easily pulled out by its roots.
 Figure 3. Maned barley: photo
 The crops do not need to be fed, but in the spring, after the first shoots appear, it is advisable to remove weeds and organize regular watering in dry weather.
Soil preparation and fertilization
The soil for sowing is prepared in the fall, immediately after harvesting the predecessor. The soil is dug up and measures are taken to retain snow cover. This helps saturate the soil with moisture before spring sowing.
In the spring, immediately before adding seeds to the soil, additional shallow loosening is carried out, which allows the soil to be saturated with moisture and air.
 Figure 4. Fertilizing crops at home
 Timely application of fertilizers plays an important role in obtaining good yields (Figure 4). Since the crop is demanding on soil fertility, fertilizers are applied in the fall and spring (repeatedly).
Note: After the emergence of seedlings, it makes no sense to fertilize the plants, since they will not be able to fully absorb the nutrients.
To strengthen the roots and form large ears, phosphorus and potassium fertilizers are applied during autumn plowing and directly during sowing. It is important that the plant responds better to mineral fertilizers than to organic fertilizers.
Requirements for the site for sowing
Despite the fact that the crop is grown in all climatic zones, it is demanding on the level of soil fertility. If the soil is acidic, young shoots may stop growing or even die, and with high humidity, the crop is affected by rot and fungal diseases.
Lighting
For normal fruiting, plants require good lighting. If the area is poorly lit, the plants will develop slowly and the period for the formation of ears will be delayed.
This condition is relevant not only for mid-season, but also for early varieties, so the areas for sowing should be well lit throughout the daylight hours.
Barley: heat requirements
The culture grows well in any climate zone, regardless of temperature. Thanks to early sowing, young shoots are resistant to frost and produce high yields.
In addition, it is one of the earliest grain crops, and the timing of sowing and emergence allows the shoots to grow stronger before the first weeds and pests appear.
Humidity
The crop tolerates drought well, and excess moisture can cause root rot and provoke fungal diseases. Plants require the most liquid at the stage of eruption and at the beginning of the formation of ears.
A severe lack of moisture, as well as its excess, at the initial stage of plant development leads to the formation of barren shoots or causes the death of plants.
Caring for barley crops
Caring for the crops includes only a few activities, since this grain crop is considered unpretentious:
- In arid regions and areas with light soils Immediately after sowing, rolling is carried out, but if a crust appears on the surface of the soil, it is necessary to carry out surface transverse harrowing.
- At later stages of cultivation, already in the grain ripening phase, they add fertilizer, which helps increase the amount of protein in the product.
- During culture growth they use herbicides to control weeds and special preparations to prevent lodging of crops.
It is also necessary to regularly inspect the field and spray if pests or their larvae are detected.
From the video you will learn how to grow crops hydroponically at home.
Storing unripe barley grains
The main purpose of storing grains is to preserve their nutritional value and ability to germinate. Small volumes of crops can be stored on the floor in barns or sheds. The main condition is that the room must be dry and clean, and the interior space must be well ventilated (Figure 5).
 Figure 5. Methods for storing grain
 Varietal seeds intended for sowing are stored in bags made of thick fabric. In such containers, seeds consume less oxygen and retain their ability to germinate.
When storing grain, humidity and temperature play a particularly important role. The moisture level should not exceed 12%, otherwise the raw materials will begin to rot and become moldy. The temperature should not exceed 10 degrees. When this indicator increases, microorganisms begin to develop in the storage facility that can destroy the entire crop.
Eating sprouted barley as a dietary supplement improves a person’s general condition and is considered part of a healthy lifestyle.
For example, sprouted barley allows the endocrine system to work stably. Sprouted grain contains many biologically active substances that are vital for the human body.
Barley is one of the oldest grains, rich in complete protein; its use in nutrition has allowed humanity to survive in the most difficult conditions. Barley flour was actively used for making bread for a long time until it was replaced by wheat. The modern diet includes dishes containing this grain in the form of porridges and soups. Today, such a valuable additive is used in the production of healthy products.
Positive effects of grain sprouts
Humanity has known about the benefits of sprouted barley since ancient times. The endocrine system has evolved its mechanisms based on the biologically active substances present in this plant. She suffers from a lack of nutrients available in this cereal, and reacts positively to their intake into the body.
The benefit of cereal with sprouts is that a person who regularly consumes it will be in good physical shape for a long time, easily coping with all daily stress. Sprouted barley contains:
- Proteins that are needed for the normal functioning of the internal secretion organs.
- Selenium is present in such large quantities that this product can be classified as a powerful antioxidant.
- B vitamins that have the property of actively stimulating the functioning of the central nervous system.
- Proteins with valuable amino acid composition.
- Minerals that have a beneficial effect on the functioning of the endocrine system.
- A large amount of fiber, which collects toxic deposits from the intestinal walls and removes them out.
- Phosphorus is involved in all types of metabolism, allowing to normalize the functioning of the nervous system and heart muscle.
People leading a healthy lifestyle are recommended to sprout grain at home. If such troubles are burdensome, then you can buy already sprouted and ready-to-eat grains in the store. By the way, you can also use durum flour from sprouted barley. Modern technologies make it possible to preserve all the properties of the cereal during processing, and the health benefits of using flour will be undoubted.
What is the value of ground sprouts?
Talkan is the name of wholemeal flour made from sprouted barley. This product retains the nutrients and beneficial properties of the grain for human health, as well as water-soluble fiber. To use talkan effectively, it is added in small doses to first and second courses.
If you brew barley talkan, you will get a mucous decoction, which will be very useful for those who maintain gentle diets for diseases of the gastrointestinal tract of an inflammatory nature.
The properties of wholemeal flour will be fully revealed if you make porridge from it, which can be eaten with dried fruits or cold-pressed oil. Flour is added to yeast dough, pancakes are baked from it and cookies are made. Food prepared with the addition of talkan will become a powerful stimulant of the body’s vital functions due to its beneficial properties that are preserved even when sprouted grains are processed.
After eating coarse barley flour, a person feels that:
- Rapid saturation occurs, and this allows you to reduce a single portion of food by 2 times.
- There is no feeling of hunger for a long time, because nutrients are absorbed to the maximum.
- A program to rid the body of extra pounds is launched.
- Metabolic processes improve due to a balanced diet.
- A feeling of health and strength comes, which allows you to accomplish everything you have planned.
- children during periods of rapid growth;
- with a tendency to allergic reactions;
- if there are metabolic disorders;
- adults with increased physical activity;
- athletes who regularly engage in weightlifting, running, swimming;
- for vegetarianism, to compensate for the deficiency of vital amino acids;
- during depression and prolonged stress;
- if there is a history of fatty liver and certain diseases of the gastrointestinal tract.
Sprouted barley and flour made from it are especially useful for teenagers and people under 50 years of age. In old age, barley dishes may be too rough and cause harm to the body.

Pantry of beauty and strength
Traditional healers also appreciated the unique properties of the cereal. They use sprouted grains for decoctions and infusions, which retain all the properties and are beneficial for men's and women's health. For example, nursing mothers can use decoctions if there is a lack of breast milk. For men, barley supplements will give strength and will be useful in the treatment of prostatitis.
The beneficial effects of cereals on human skin have also been known for a long time. Moreover, barley is very beneficial for the skin both when consumed internally and when used externally. The high level of vitamins contained in the cereal has an antioxidant effect, slows down aging, and protects the skin. Ground sprouted grains are used as additives to masks and facial scrubs, and decoctions are added to baths.
The composition of microelements in barley is so balanced that it makes the product indispensable for maintaining calcium levels in the body, preventing bone and musculoskeletal diseases.
When should you not eat grains?
Contraindications to the use of the product for practically healthy people are minimal. Barley should not be eaten if you have an individual intolerance. Doctors do not recommend barley porridge in old age or with certain intestinal diseases due to the large amount of fiber in them. With old age, the layer lining the intestinal walls becomes thinner, and a large amount of fiber contributes to the formation of erosions and ulcers.
At the end of life, foods containing large amounts of coarse fiber can harm the digestive tract. This occurs because the accumulation of plant fibers in a sluggish intestine causes an attack of flatulence and intestinal colic. When irritable bowel symptoms develop, the properties of coarse fibers do more harm than good.
To avoid harm, barley flour and sprouted grains of this cereal should be consumed with caution in old age. This will allow the body to receive the nutrition it needs and minimize the damage from fiber. Contraindications to the use of sprouted barley grains in any form are:
- constant discomfort in the abdomen;
- problems with stool;
- exacerbation of peptic ulcer of the stomach and duodenum;
- bloating;
- the appearance of colic;
- exacerbation of cholelithiasis;
- pancreatitis.
Contraindications are often temporary, because you can always determine the optimal daily intake, which will only bring benefits to the body. There will be no harm from fiber if you drink enough drinking water. This will improve the movement of food through the digestive tract.
Expert opinion

I would like to note an important point - the length of the seedlings should be 1-2-3 mm, no more. The grain activates incredible energy to produce a sprout, and when it is small, the maximum benefit is concentrated in it. Also remember that sprouted grains are not compatible with milk. But you can add them to salads, cereals or eat them on their own.
Inna Verbitskaya, nutrition specialist
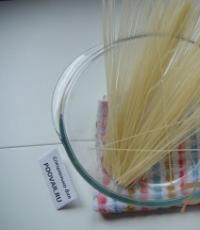
How to germinate barley grains Wash the barley grains with cool boiled water, then soak in water for 24-36 hours. The water for soaking grain must be changed every 7 hours. At the end of the soaking process, moistened barley grains should be placed between two layers of gauze or cotton cloth well soaked in warm water, placed on the bottom of a glass or enamel bowl (the grain layer should not exceed 2-3 cm). Then cover the dishes with a lid and put them in a dark place with a temperature of 18-20 degrees. During the germination process, the top layer of fabric covering the barley grains must be periodically moistened (as it dries), and the grains themselves must be ventilated once a day, opening the lid and the top layer of fabric for 15-20 minutes. Barley sprouts 1-3 mm high should appear within 2-3 days (the speed at which sprouts “peck” depends on the variety and quality of the barley grain). At the end of the germination process, barley must be washed in cool boiled water 2-3 times, after which it can be eaten. Tips for germinating barley - The length of barley sprouts should not be more than 3 mm (it is in sprouts 1-3 mm long that the concentration of biologically active substances and vitamins is highest). - Sprouted barley grains can be stored in the refrigerator for no more than 24 hours. Why are sprouted grains healthier than unsprouted grains? During the process of germination, the activity of enzymes in barley grains is activated, promoting the breakdown of nutrients into organic components that are simpler in structure and easily digestible by the human body. Thus, when eating sprouted barley grain (barley malt) for therapeutic and prophylactic purposes, the human body spends significantly less energy on the absorption of nutrients than when consuming traditional food products made from unsprouted barley grain (barley and pearl barley, barley bread). A characteristic feature of sprouted barley grain is also its higher content (compared to ripe, unsprouted barley grain) of vitamin E and B vitamins. ️ Contraindications to the use of sprouted barley grain and barley decoctions: Sprouted barley in some cases causes increased gas formation, in therefore, its consumption is not recommended for people suffering from flatulence, and is also contraindicated for diseases of the gastrointestinal tract in the acute stage. In addition, you should not eat sprouted barley grains at night. During treatment with barley decoctions, you should refrain from eating egg whites. Barley water should not be consumed with honey or vinegar. If you found this information useful, click “Like” and save it to your feed!
Attention: This article is intended for persons over 18 years of age.
Malt can be added to everything from vinegar and whiskey to milkshakes. In particular, barley malt is most often used in the production of beer, and if desired, it can be obtained at home. Raw barley can be purchased at supermarkets, brewing supply stores, equestrian supply stores, and some pet stores. The process of making malt involves repeatedly steeping the grains to germinate, keeping the grains wet while they germinate, and then drying them to stop the growth.
Steps
Part 1
Soak the barley- The soaking process will dissolve the dirt and husks into the water, and then you will drain it. As a result, the malt will be purified and taste better.
- If necessary, barley can be soaked for more than 8 hours, but do not do this for more than 16 hours at a time, otherwise the grains may drown in the water.
-
Drain the water. Place the barley in a large sieve or colander to remove the water. While the water is draining, wash the bucket with hot water and soap. After this, rinse the bucket thoroughly to remove all remaining soap. This way you will prevent the growth of bacteria and fungus.
Leave the grains to air dry for eight hours. After the water has drained, pour the barley into a washed bucket and leave it there to dry for eight hours at the same temperature so that the grains receive enough oxygen.
- While the barley is drying, wash the sieve with hot water and soap.
-
Repeat the soaking and drying process. After eight hours, pour enough cold water into the bucket of barley to completely cover the grains. Leave the barley to soak for another eight hours. Then pour it into a colander, and then into a bucket, and leave it to air dry for eight hours.
- Do not forget to wash the bucket and sieve (colander) with hot water and soap every time.
-
Check to see if the grains have sprouted. Scoop up a handful of barley and see if small white ridges appear at the bottom of the grains. These are small roots that should appear after the barley has absorbed enough water. As a result of the soaking and drying cycles, about 95% of the grains will sprout.
Part 2
Sprout barley-
Spread the grains in a single layer on the baking sheets. Spoon the grains onto one or more baking sheets and smooth them out with your hand so they are in a single layer. The grains may touch, but should not lie on top of each other.
- If you have a lot of barley, you will probably need several baking trays.
-
Place baking sheets in plastic bags. Open a large plastic trash bag and place it on a flat surface. Place the baking sheet with the barley into the bag and tuck the edge under the baking sheet to seal. Polyethylene will retain moisture while the grains germinate.
- Do the same with the other baking sheets.
-
Keep the barley in a cool, well-ventilated place. The grains will germinate best at a temperature of 18°C. The trays containing the barley can be placed in a well-ventilated area, such as an attic, garage or basement.
- If the temperature or humidity is too high, mold can form in the barley. If it is too cold or dry, the grains will not germinate properly.
-
Spray and turn the grains every 4–8 hours. Barley produces heat as it germinates and care must be taken to keep it cool and moist. Remove the baking sheet from the bag and spray the grains with cold water. At the same time, turn each grain by hand. Then place the pan back into the bag and tuck it under the bottom of the pan.
Monitor the size of the seedlings. Each time you spray and turn barley, take a few grains and check how much the sprouts have enlarged. Turn the grain over onto the flat side and use a knife to cut the husk lengthwise. You will find a sprout that is growing upward (in the opposite direction from the roots). The germination process is complete when the sprouts reach approximately the same length as the grains themselves.
Part 3
Dry the barley-
Place the barley on the racks of your food dehydrator. Remove the baking sheets from the bags and pour the grains onto the food dehydrator racks. Lay them out by hand in a single layer.
- Drying the beans at a low temperature will stop their growth and remove excess moisture.
-
Place the barley in a large food grade bucket. You can use any number of barley grains to make malt, as long as you have the appropriate equipment. You will need a large bucket, a strainer, baking sheets and a dehydrator.
Fill a bucket with cold water and leave the barley to soak in it for 8 hours. Pour in enough water to completely cover the grains. Water initiates germination of grains. Do not cover the bucket and place it in a cool place. Soak barley at a temperature of 10–16 °C.
The peoples of Mesopotamia learned to make something similar to beer long before our era. Even then, the principle of preparing alcoholic beverages from starch-containing raw materials became clear to humanity. Malt still plays a key role here, which our moonshiners have recently preferred to make at home.
A little theory. Alcohol is formed as a result of the vital activity of yeast cultures. Alcohol, carbon dioxide and heat are waste products of this vital activity, the result of the processing of simple sugars. Starch is a polysaccharide, a “complex sugar,” and as one experienced home distiller says: “...it’s too much sugar and it won’t fit into the yeast’s mouth.” Consequently, you cannot cook anything stronger than paste from starch. But it can be saccharified, that is, the polysaccharide chain can be broken into monosaccharides that are tasty to yeast. Malt will help us with this.
Malt is artificially sprouted cereal grains (barley, rye, wheat, oats, millet, etc.). As a result of germination (also “malting”, “saccharification”) of grains, enzymes appear in them that break down polysaccharides into monosaccharides. Also, during the process of saccharification, the cell membrane in which starch is securely “packed” is destroyed and the contents of the cell become accessible to enzymes.
If we talk about the scope of application of malt, it is quite extensive. If you are not new to the topic of eaux-de-vie, then you should definitely know that whiskey is made from barley malt (and other things). Malt is also a key component in the preparation of beer, kvass and the like. But for us, “hereditary moonshiners,” malt enzymes are of another value - they allow us to quickly and at minimal cost saccharify starch-containing raw materials, and then ferment it and make tasty moonshine. Cheap moonshine.
They act in the same way with, in the same way they acted. Today we will talk more about green malt, that is, just sprouted and requiring quick use. Green malt is the most active and we will consider its ability to saccharify starch to be 100%. From it you can easily obtain so-called light (white, also known as diafarin) malt, the activity of which drops slightly - up to 80%. Diafarin is stored for 1 year or more.
With proper germination, 1 kg of dry grain produces a sufficient amount of green malt to saccharify 6 kg of starch-containing raw materials.
I repeat once again: we germinate malt to a large extent for the saccharification of starch-containing raw materials, for its further fermentation and distillation. For the production of beer and kvass, a slightly different malt is used, although the technology for its production is very similar to that described below. I will definitely describe the technology for preparing beer malt (including for kvass), as well as barley malt for making whiskey, in the following articles. So, let's move on to practice.
This is a very important stage, since it is good grain that produces high-quality malt, which is what we strive for. First of all, you need to decide on the culture. Wheat and rye are ideal for home germination - these are naked crops, so they germinate quickly enough and are easily crushed. Barley malt also germinates well, but the process takes longer. On average, green barley malt is produced in 9-10 days, 5-6 days for rye malt, 7-8 days for wheat malt, 8-9 days for oat malt.
Fresh, just harvested grain is not suitable - it has very poor germination (ability to germinate). At least 2 months must pass from the date of harvest, but no more than 1 year. The grains must be fully ripened, full, heavy, and light yellow in color. Inside: loose, white and mealy. When immersed in water, full-bodied grains sink. Of course, the raw materials must be well sifted, without any weeds.
You can check the germination of grain yourself. To do this, you need to select 100 large grains and place them in a glass of water. Remove those that float and replace them with the same amount of full-weight ones that sink. Then the grains should be placed on a saucer, covered with a damp cloth and left in a warm, dark place. If necessary, the fabric should be moistened. After 2-3 days, we check germination - we count the number of ungerminated grains and get a percentage. A good raw material for producing any malt is grain, which has a germination capacity of at least 90-92%.
Cleaning and disinfection of grain, soaking
Pour clean, sifted grain into a suitable container and fill with water. We remove floating, hollow grains and debris. Rinse a couple more times until you get clear water. Pour water again so that it covers the grains by 3-5 cm, and leave for 6-8 hours, no more. With this method, germination takes a minimum of time (“flow method”). In traditional malting technology, the grain is soaked until its moisture content reaches 40% - the shell is easily separated from the pulp, the grain does not break when bent, and a sprout is indicated. With this method, the water needs to be changed every 6 hours in the hot season, and every 12 hours in the cold season. This takes 24 hours or more.
The following procedure is not mandatory, but highly recommended. After soaking, the grain must be washed again and poured with a weak solution of potassium permanganate or iodine for disinfection (per 10 liters of potassium permanganate water on the tip of a knife or 30-40 drops of iodine). If this is not done, putrefactive bacteria may develop in the grain during cultivation. We wait 15-20 minutes, drain the solution, wash the grain again and send it for germination.
Important! The water must be drained completely. The grain should be moist, but not wet. The main thing is to prevent white liquid from escaping when the grain is broken - this is a sign that the grain has been overexposed to water and is not suitable for making malt.
Malt growing
There are two fundamentally different ways of germinating grain: “spillover” and rotation without watering. Let's start with a simple method of germinating malt without watering, often described in the literature.
Growing malt without watering
After soaking, and in this case this is a long process of 24 hours or more, the grain must breathe. After disinfection, wet grain should be distributed into boxes in a layer of 5 cm for 6-8 hours. Every 2-3 hours, the grain needs to be mixed, raised above the box, thus blowing it through and reducing the amount of carbon dioxide. Next, the “breathed” grain should be poured into boxes/basins in layers of 10 cm and left for 8-12 hours in a well-ventilated area. To even out growth, the top of the boxes can be covered with a damp cloth.
Important! While growing grain indoors, it is very advisable to maintain the temperature around 17-18 o C. If the temperature is lower, grain growth will slow down. If it is higher, there is a risk of rotting and mold.
Then the procedure boils down to constant ventilation and moistening of the mass. After the first 8-12 hours, the grain must be stirred, lifting it with your hands above the boxes, blowing it through. Also, during cultivation, it is necessary to maintain the grain moisture content around 40%, so dry grain (determined by eye) must be sprayed with water, but not abundantly - for 5 kg of dry grain no more than 50-70 ml of water per spraying.
Every 6-8 hours of germination, the grain needs to be turned and sprayed.
If moisture accumulates at the bottom of the box, if it is not perforated, it must be removed and the grain dried - too much moisture is bad for growth. For the first 3-5 days of growing, the grain (in this case we mean barley, and therefore longer periods) needs to be well and regularly ventilated. At the second stage, it is better to limit the air flow - this reduces the loss of starch, etc. It is not necessary to do this at home; this is what they do in production.
Barley malt after 4 days of germination.
When turning grain, do not be afraid to break sprouts or roots, since biological processes inside the grain will still continue and enzymes will continue to be synthesized. On the 2-3rd day of cultivation, the temperature inside the grain mass will begin to rise to 20-24 o C, and the mass itself will begin to increase. It is important here to prevent the grain from “sweating”; therefore, during this period it needs to be stirred especially often, and if necessary, reduce the layer to 5 cm.
The malt is ready when the sprout reaches the length of the grain itself or slightly more. For example, a barley sprout reaches a length of 5-6 mm. Don't confuse sprouts with roots. The latter are longer and thinner than the sprout (in barley they reach 12-15 mm).
Other signs of readiness of green malt: the grain has become sweet, has lost its floury taste, and crunches when bitten; the malt has a pleasant cucumber aroma; The roots are intertwined, it is difficult to take one grain separately.
Growing malt using the pour-over method
After disinfection and airing, the grain is loaded into any perforated container - basins with small holes, boxes with a sieve at the bottom, etc. At least twice a day, the grain should be watered generously with water, for example, from the shower, for about a minute. If you want to speed up growth, water with warm water, if you want to slow down, water with cold water. It is advisable to do the spill 4-5 times a day. This is more necessary to wash away bacteria. It is advisable to change the top and bottom twice a day (boxes with a sieve on the bottom and top are ideal for this). The readiness of malt is determined by the criteria described above.
Drying green malt
After germination, malt must be disinfected. To do this, you need to soak it for 30-60 minutes in a weak solution of potassium permanganate or iodine. You can speed up the process to 15-20 minutes using a strong solution of potassium permanganate - 0.2-0.3 g/l. Green malt can also be washed with a 1% sulfuric acid solution.
Green barley and any other malt must be put into production as quickly as possible. At this stage, it is an ideal environment for the growth of various bacteria and fungi, which can seriously compete with the yeast in the mash. Of course, before using green malt, it must be ground. An ordinary meat grinder or special malt mills, which can be bought in beer stores today without any problems, are ideal for this. If you don’t manage to use the malt right away, put it on the bottom shelf of the refrigerator in a rag bag - it will last there for another 3 days.
Drying malt outside. Photo: forum.homedistiller.ru
But it is better to dry the green malt. This way you will get light malt or diafarin, which can be stored in a jar for more than a year, which is very convenient. Drying is carried out at a temperature no higher than 40 o C - higher, which means the enzymes are destroyed. Drying should be fast, vigorous, with intensive ventilation and constant temperature. In everyday life, warm floors in a well-ventilated room are ideal for this. In general, special drying cabinets are used for this. You can get by with a spare room with a wind heater. You can finish drying the malt on the radiator in winter or on the balcony in summer. If you have a private house and you make malt in the summer, you can dry it on a hot day in the attic.
After drying, the malt should have a moisture content of about 3-3.5%. Signs: the grains are dry to the touch, have a sweet taste, roots and sprouts are easily separated by rubbing in your hands. “White” malt has a fairly high enzyme activity - about 80% of 100% green malt.
Grinding it is a little more difficult: here you will need the millstones of a malt crusher or coffee grinder. 1 kg of diafarin saccharifies 4-5 kg of raw materials, which, in my opinion, is a good indicator. True, the drying process needs to be carefully thought out and done correctly.
Malt storage
Before packaging “white” malt, you need to get rid of the sprouts and roots that are still left on the grain. To do this, you need to grind the malt with your hands or pour it into a bag and roll it until the sprouts separate on their own. After this, the malt must be sifted in the wind or in front of a fan. It should be stored in a dry place in a closed container. The resulting malt can be used to saccharify almost any starch-containing raw material: rice, wheat, barley, millet, peas, rye, corn, oats and even potatoes.
Light malt is ready. You can store it for years.
True, different cereals produce slightly different enzymes in their action, so to prepare malted milk (a mixture of malt and water), you should use a mixture of malts. It is not recommended to use malt for saccharification of the raw materials from which it is made. For thought, the composition of malt for saccharification of wheat and rye:
Wheat:
- 50% barley, 25% oat, 25% rye malt.
- 50/50 mixture of rye and barley or 50/50 barley and millet.
Rye:
- 50% wheat, 25% barley, 25% oat malt.
- 50% wheat, 40% barley, 10% oat malt.
- 50/50 barley and oats.